Multi-Sample Recipe
Before following the recipe instructions in this section, first make sure you are familiar with Basic Recipe Techniques.
This example demonstrates how to set up a recipe to handle multiple samples, each with several sites. The recipe will prompt the user to change samples and perform a rotation-compensation (deskew) alignment procedure each time a new sample is loaded.
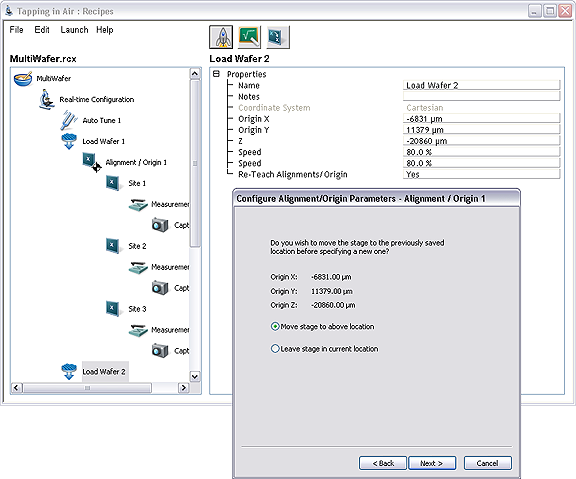
The Multi-wafer.rcx recipe, shown in Figure 1, will:
- Perform a Cantilever Auto-tune
- Move the stage to the unload position and prompt the user to load a wafer
- Guide the user through a rotation compensation alignment procedure
- Perform three measurements at three different sites
- Unload the sample and prompt the user to load a second one
- Guide the user through a rotation compensation alignment procedure
- Perform three measurements at three different sites
- Withdraw and create a report
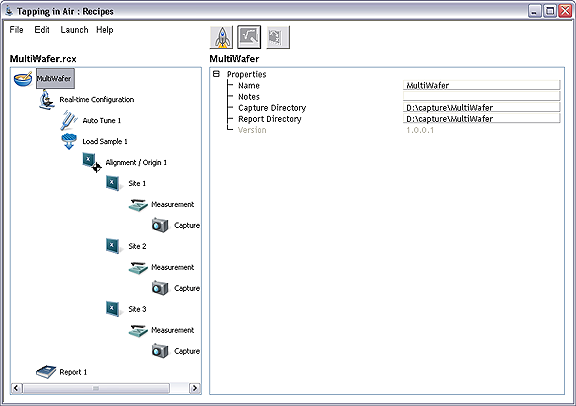
Figure 1: Multi-wafer.rcx recipe
Setting Up the Recipe
Create a new recipe Multi-wafer.rcx
- Create a new directory in D:\Capture, and direct all of the captured images and reports to be created in this new directory.
- Set up the Real-time Configuration with an Auto Tune node and a Load Sample as child nodes.
- Create an Alignment / Origin node as a child node to the Load Sample node.
Do not program the Load Sample node yet.
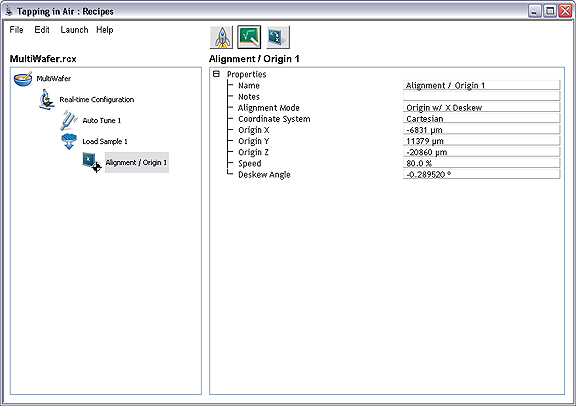
Teach the Alignment / Origin 1 node with Deskew X Axis alignment
- Select the Alignment / Origin 1 node and engage the Professor. Select Origin w/ Deskew X Axis as the alignment mode.

NOTE: Choosing this option will allow future samples to compensate for slight rotations in the wafer's placement on the stage.
- Select Next to continue. The Professor will prompt the you to Focus the optics on the probe Tip.
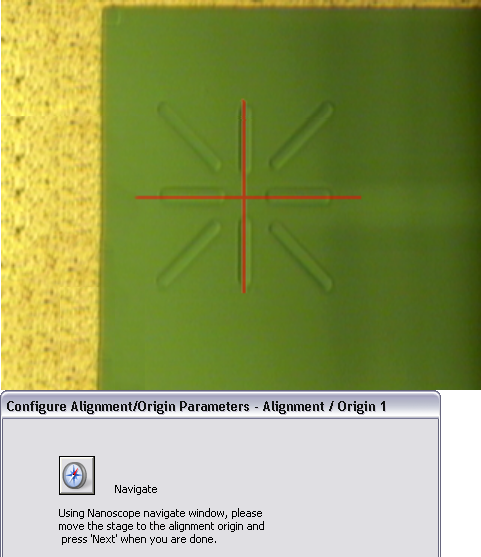
- Click Next to open the Navigate window.
- Adjust the Z Motor to Focus on the Sample, and move the XY stage to the origin position. Choose an origin site that is highly recognizable:
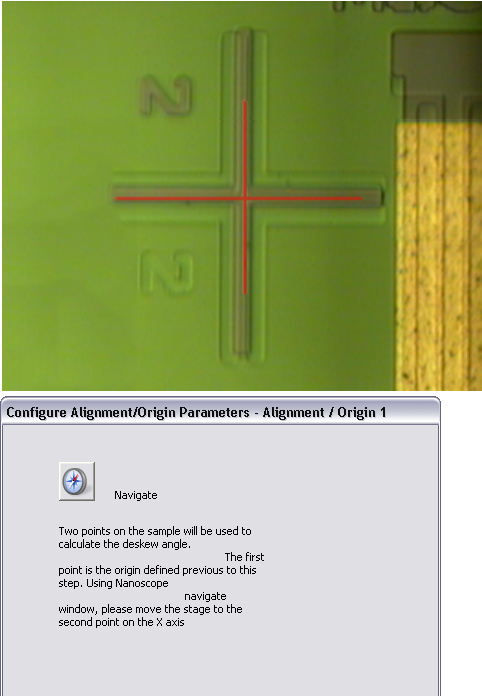
- Click Next. The professor now asks the user to locate two points along the x-axis (horizontal) to be used in calculating the deskew angle. The further away from the origin location these points are, the more accurate the deskew angle calculation will be. Choose locations that are highly recognizable.
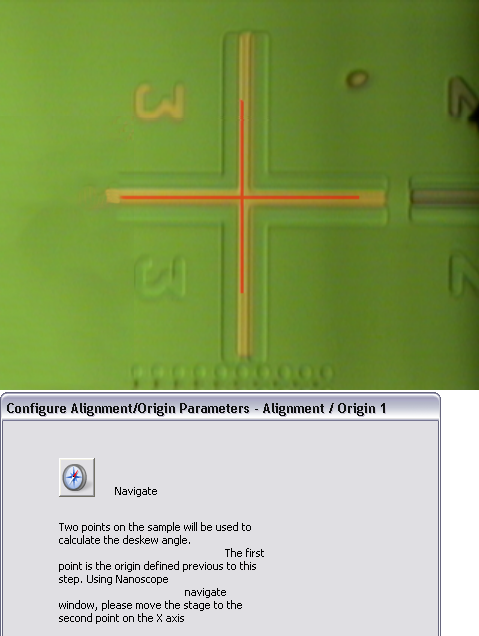
- Click Next and navigate to the third and final point for the X-axis deskew calculation.
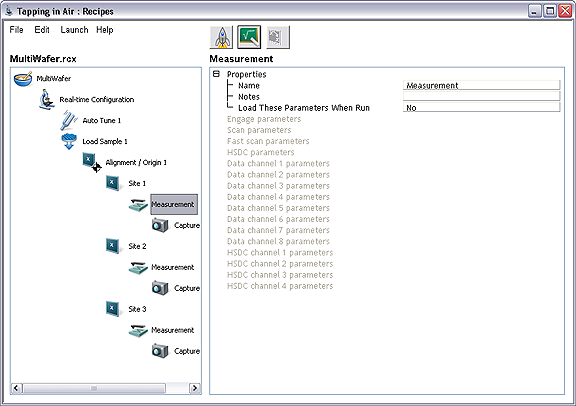
Create the sites
The programmed Alignment / Origin 1 node has associated with it an XYZ coordinate set as well as a Deskew angle. The locations of the sites that are referenced to this Alignment Origin 1 node will be compensated for rotations of future wafers:
Create three sites as child nodes to the Alignment / Origin 1. Teach the XYZ position of each site and program the Measurement nodes with appropriate scan parameters.
Teach the Stage Load/Unload position
The stage load/unload position must be manually programmed. The reason for this is that different microscopes and samples may have a variety of appropriate stage load/unload positions.

|
- Open the Navigate window by selecting the Navigate icon from the Workflow Toolbar
|
| |
- Under the XY Stage panel, move the stage to an appropriate sample load/unload location.
- Make sure to also move the Z Motor up a reasonable distance so that samples may be changed without a chance of crashing the cantilever during this process.
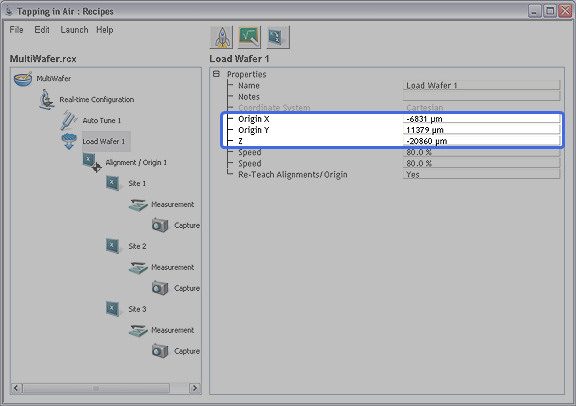
- With the stage in its load/unload position, note the stage X, Y and Z location values (listed in μm). These values are shown at the bottom right hand side of the screen, above the Windows task bar. Make sure to also note the sign of these values.
|

| |
- Enter the stage X, Y and Z location values into the Load Sample 1 node properties:
|
| |
The recipe will move the stage to this location when it is time to load a new sample.
|
Finish creating the recipe
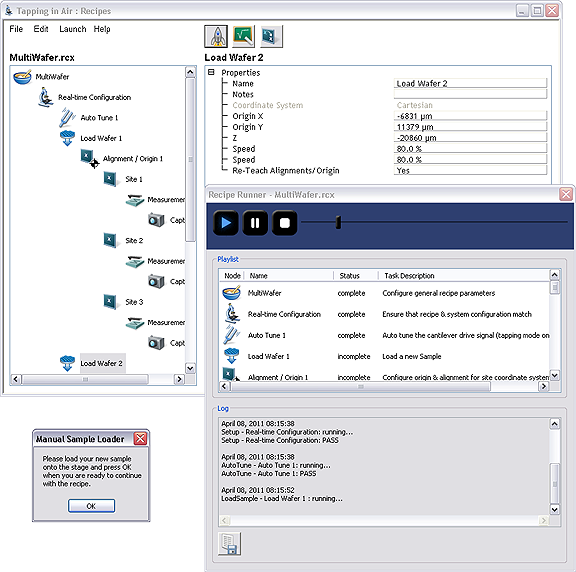
- Finish creating the Multi-wafer.rcx file by copying the Load Wafer 1 node and pasting it onto the Real-time Configuration node.
- Rename the second load wafer node to Load Wafer 2.
- Create a Report node as a child to the Real-time Configuration node.
Executing the Recipe
Run the "Multi-Wafer.rcx" recipe
- Open the Recipe Runner by selecting Run Current from the Launch menu.
- Press the Play button to begin. When the recipe reaches the first Load Sample node, the recipe will move the stage to the load/unload position and then prompt the user to load a new sample onto the stage.
- Press OK once the new sample has been loaded:
Configure the "Alignment / Origin" Parameters
Once the new sample has been loaded, the recipe will guide you through the process of locating the origin and deskew points.
- Select Move stage to above location and select Next.
- Assuming the wafer has been placed in the approximately correct location, the stage should have moved the sample to close to the programmed origin location. Focus on the surface, navigate to the origin, and select Next.
CAUTION: If the sample has considerable topography (i.e. it is not a wafer) or if there is considerable variation of the sample origin location, manually moving to the desired location should eliminate the chance of crashing the tip during stage movement.
- Continue through the process of locating and selecting the two X-deskew points. These two points should be the same two points as those that were originally selected when the recipe was programmed.
- Navigate to the third point for the deskew calculation.
Continue with the Recipe Run
Once the Alignment / Origin parameter configuration process has been completed, the recipe will automatically continue on its course, imaging Site 1, Site 2 and Site 3.
When it reaches the next Load Wafer node, the recipe will again repeat the process of unloading the stage, prompting the user to change samples, and then guiding through the process of locating three points on the sample of the origin with X-deskew compensation.
| www.bruker.com
|
Bruker Corporation |
| www.brukerafmprobes.com
|
112 Robin Hill Rd. |
| nanoscaleworld.bruker-axs.com/nanoscaleworld/
|
Santa Barbara, CA 93117 |
| |
|
| |
Customer Support: (800) 873-9750 |
| |
Copyright 2010, 2011. All Rights Reserved. |
Open topic with navigation